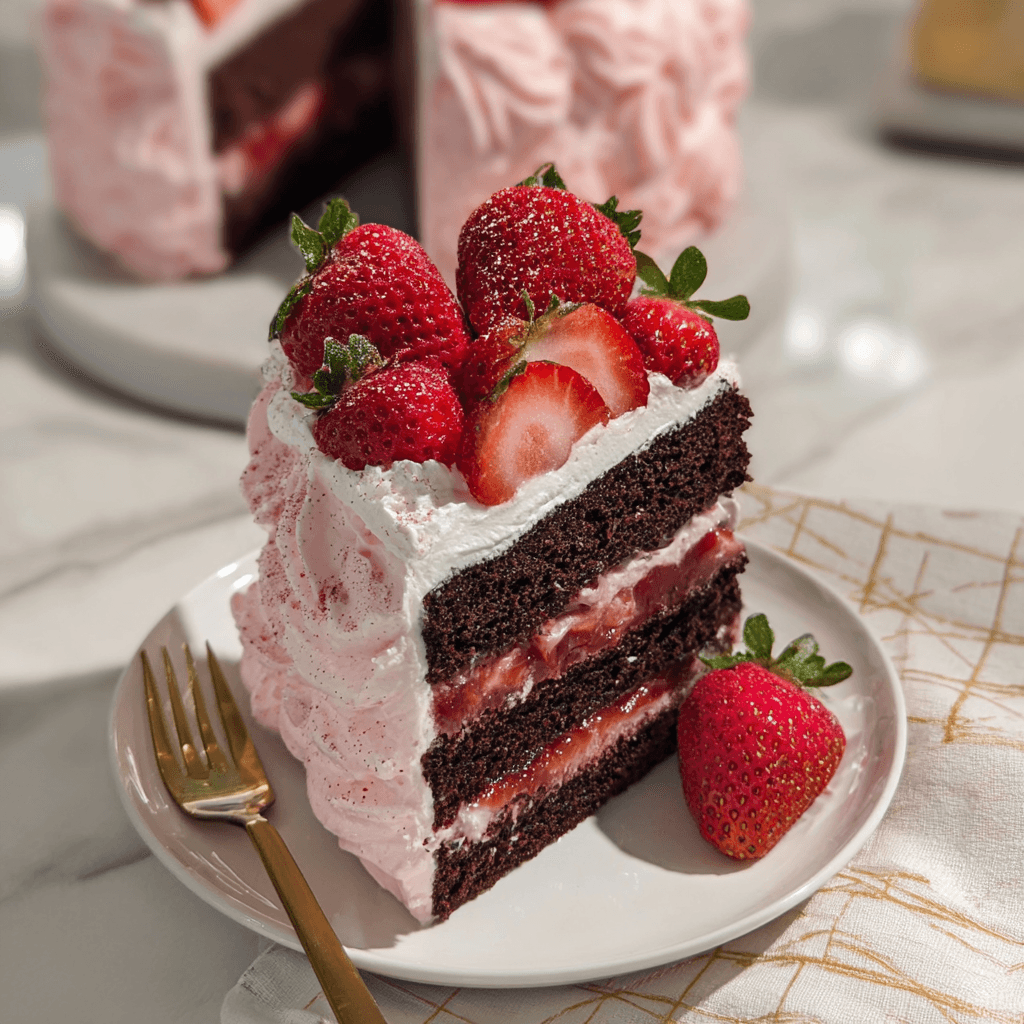
My first attempt leaned like it was trying to escape the cake stand. I had rushed the cooling, stacked the layers warm, and watched the whole thing tilt left while Ben said, “Mom, it’s moving.” It was moving. We ate it with spoons straight from the pan. But once I nailed it, this strawberry chocolate cake became the most celebrated thing I had ever baked.
Why This Recipe Is Special
There is a reason this cake comes out for every birthday, every celebration, and every Tuesday that needs rescuing. The chocolate layers are deeply dark and fudgy with that tender crumb that holds together when you slice it. The strawberry filling is jammy and bright, tucked between each layer like a little surprise. Furthermore, the strawberry whipped frosting is sufficiently light that the entire cake does not feel heavy. Mia calls it her birthday cake even when it is not her birthday, which tells you everything.
How To Make Strawberry Chocolate Cake
The cake that actually worked came together on a Saturday afternoon with both kids present and extremely invested. Mia had claimed the role of strawberry washer, which meant she was eating one for every three she put in the bowl. Ben was measuring ingredients with the focused intensity of a scientist, announcing each one out loud as he added it. When those chocolate layers came out of the oven and the whole kitchen filled with that warm, dark cocoa smell, both of them went completely quiet and stood at the oven door like it was a television.
The lesson that fixed everything was simple: let the cake layers cool completely before you even think about stacking them. I mean completely. Not just warm, not just room temperature on the outside. All the way through. I now put mine on a wire rack for a full hour and then into the fridge for another thirty minutes. It feels like forever when you are excited to eat cake, and Ben will absolutely remind you every ten minutes how long it has been. But a cold, firm layer holds the filling and frosting without sliding, and your cake will stand perfectly straight. Mine does now.
Main Ingredients
For the Chocolate Cake Layers
- 2 cups all-purpose flour – Spoon and level it; packed flour makes a dense, dry cake
- 2 cups granulated sugar – Sweetness and structure; do not reduce this
- 3/4 cup Dutch-process cocoa powder – Dutch-process gives a deeper, darker color and less bitter flavor than natural cocoa
- 2 teaspoons baking soda – Gives the layers their rise; make sure yours is fresh
- 1 teaspoon baking powder – Works alongside the baking soda for an even, tender crumb
- 1 teaspoon salt – Enhances the chocolate flavor; do not skip it
- 2 large eggs, room temperature – Room temperature eggs incorporate more evenly into the batter
- 1 cup buttermilk, room temperature – Keeps the crumb tender and adds a subtle tang that deepens the chocolate flavor
- 1 cup hot coffee or hot water – Hot liquid blooms the cocoa and intensifies the chocolate flavor dramatically
- 1/2 cup neutral oil – Keeps the cake moist for days; vegetable or avocado both work
- 2 teaspoons vanilla extract – Rounds out all the chocolate notes
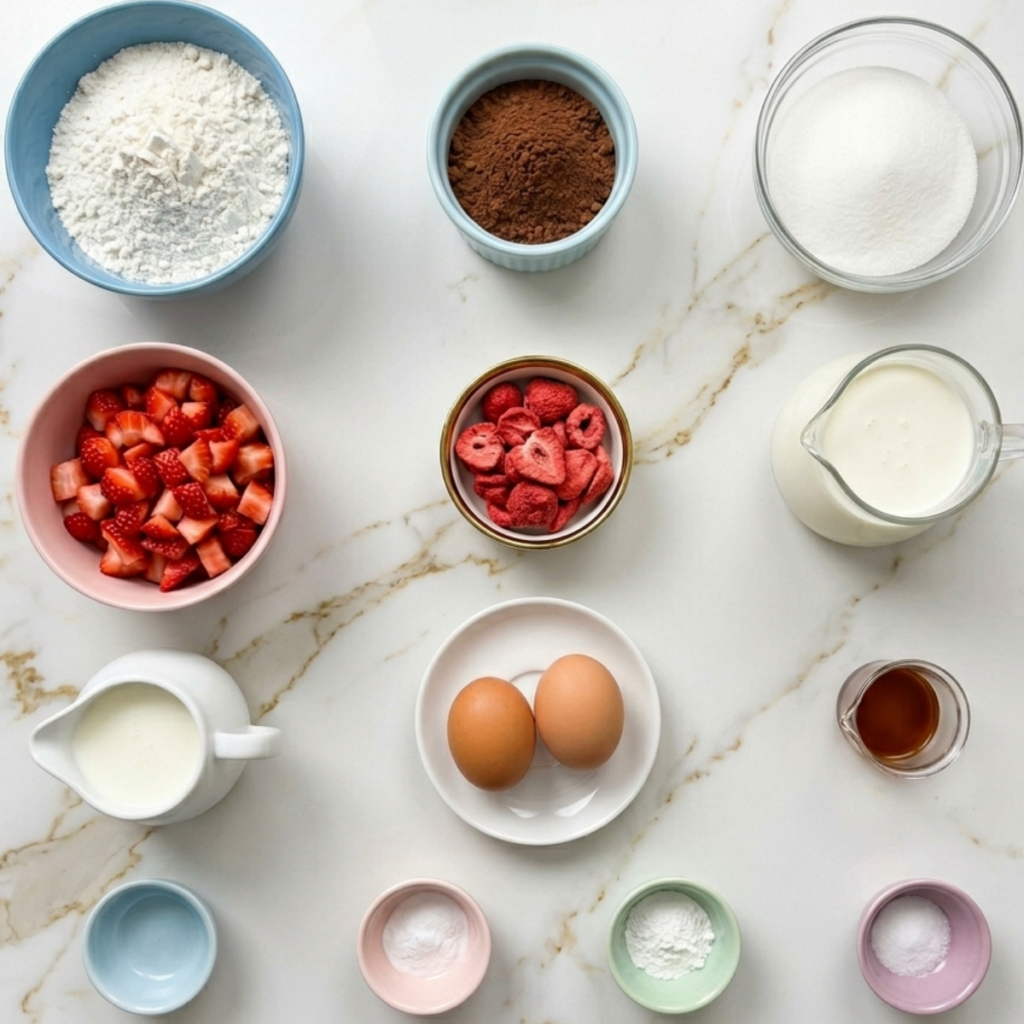
For the Strawberry Filling
- 2 cups fresh strawberries, hulled and diced – Fresh is best here; frozen releases too much liquid
- 3 tablespoons granulated sugar – Draws out the juices and helps the filling thicken
- 1 tablespoon lemon juice – Brightens the strawberry flavor and helps it set
- 1 tablespoon cornstarch – Thickens the filling so it stays put between the layers
For the Strawberry Whipped Frosting
- 2 cups heavy whipping cream, cold – Must be very cold; warm cream will not whip properly
- 1/2 cup freeze-dried strawberries, crushed to a powder – Gives the frosting its pink color and real strawberry flavor without adding liquid
- 1/4 cup powdered sugar – Sweetens and stabilizes the whipped cream
- 1 teaspoon vanilla extract – Rounds out the frosting flavor
Step-by-Step Instructions
Step 1: Bake the Chocolate Cake Layers
- Preheat your oven to 350 degrees F, grease and flour two 9-inch round cake pans, and line the bottoms with parchment paper circles
- Whisk together the flour, sugar, cocoa powder, baking soda, baking powder, and salt in a large bowl, then add the eggs, buttermilk, oil, and vanilla and mix until just combined
- Pour in the hot coffee and stir gently until the batter is smooth and glossy; it will be quite thin and that is completely correct
- Divide the batter evenly between the two pans and bake for 30 to 35 minutes until a toothpick inserted in the center comes out with just a few moist crumbs
Step 2: Make the Strawberry Filling
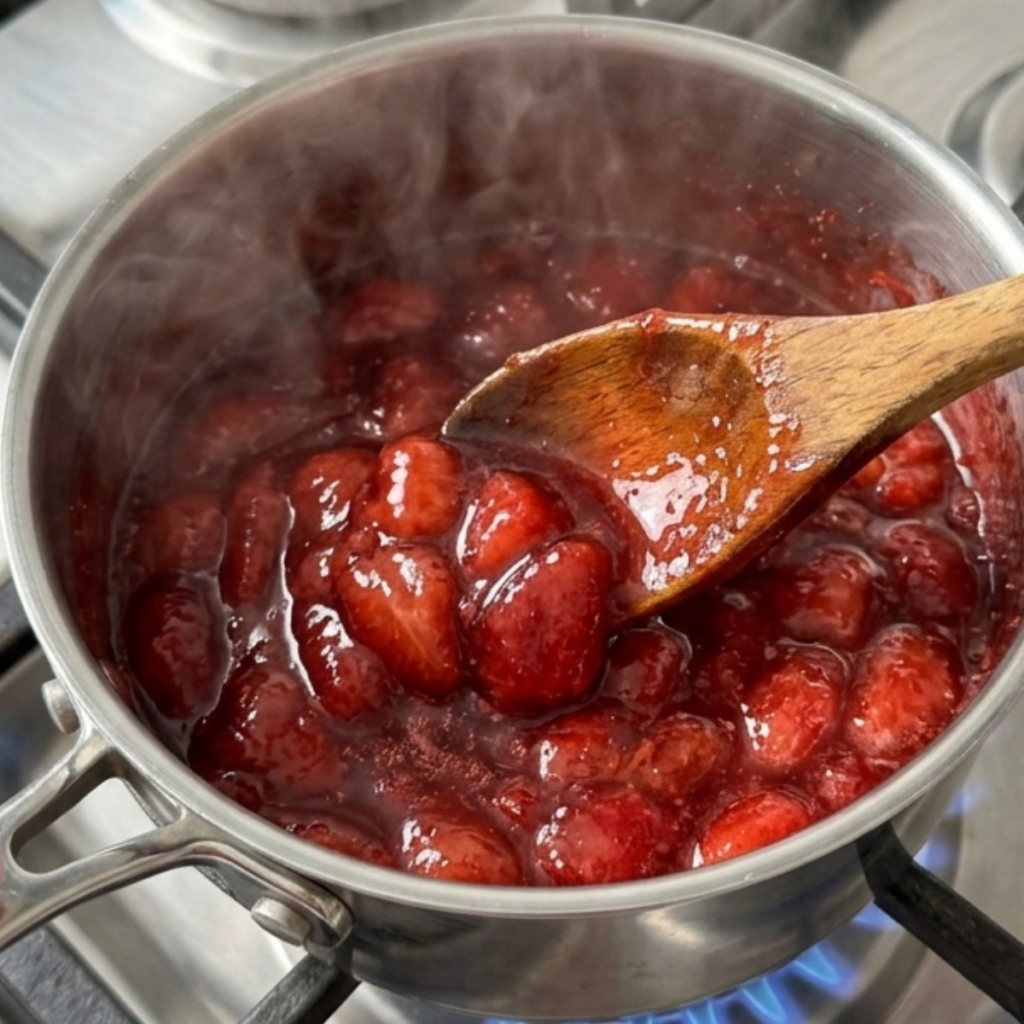
- Combine the diced strawberries, sugar, and lemon juice in a small saucepan over medium heat and stir until the sugar dissolves and the strawberries begin to release their juices
- Mix the cornstarch with one tablespoon of cold water in a separate small bowl until smooth, then stir it into the simmering strawberry mixture
- Cook for another 3 to 4 minutes, stirring constantly, until the filling thickens enough to coat the back of a spoon
- Remove from heat, transfer to a bowl, and let it cool completely to room temperature before using; a warm filling will melt the frosting and slide right out
Step 3: Make the Strawberry Whipped Frosting
- Crush the freeze-dried strawberries into a fine powder using a food processor or a zip-lock bag and a rolling pin; the finer the powder, the smoother your frosting will be
- Combine the cold heavy cream, powdered sugar, crushed freeze-dried strawberries, and vanilla in a large chilled bowl
- Whip on medium-high speed until stiff peaks form, about 3 to 4 minutes; stop as soon as the peaks hold their shape or the frosting will become grainy
- Keep the frosting in the fridge until you are ready to assemble so it stays firm and cold
Step 4: Assemble and Frost the Cake
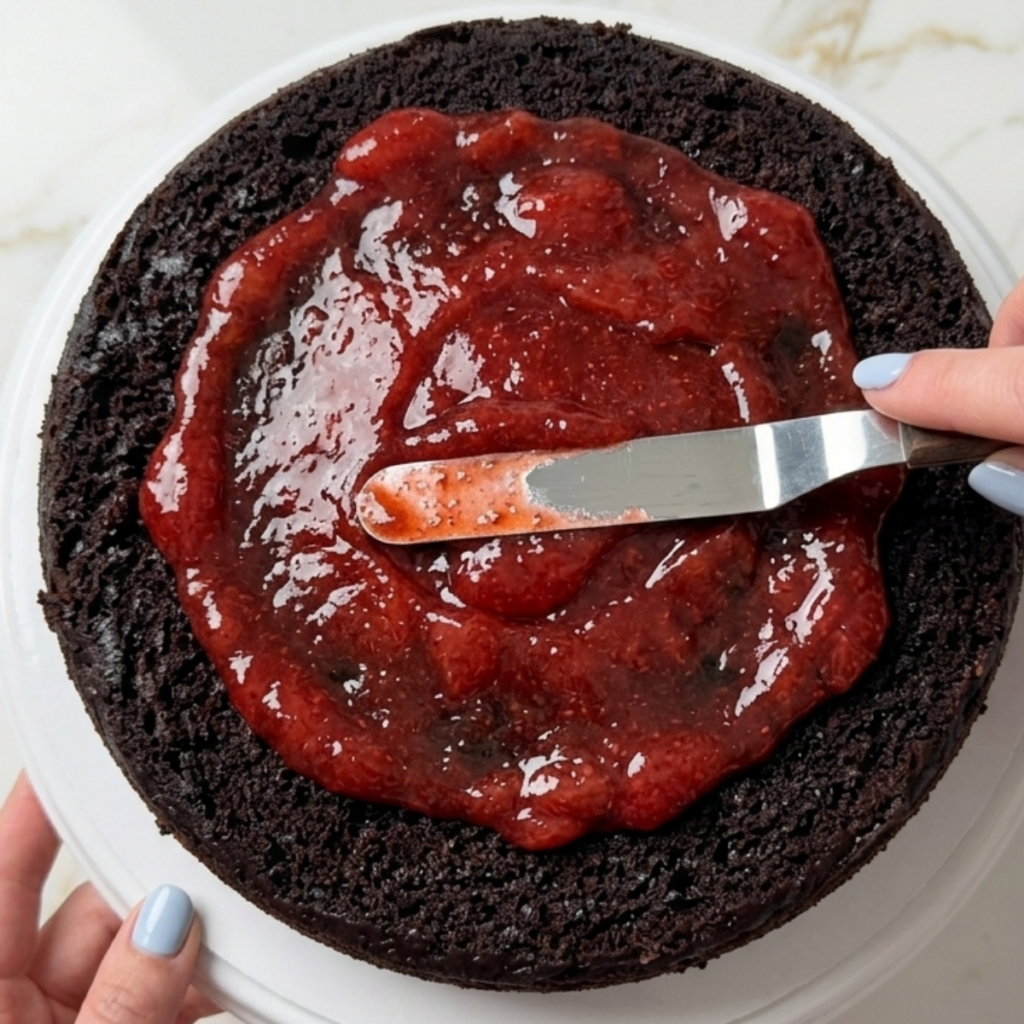
- Place one fully cooled cake layer on your cake stand or plate and spread a generous layer of strawberry filling across the top, leaving a half-inch border around the edge
- Place the second cake layer on top, press down very gently to level it, and apply a thin crumb coat of strawberry frosting all over the outside of the cake
- Refrigerate the crumb-coated cake for 20 minutes until the first layer of frosting is firm, then apply the final generous layer of frosting using a spatula in loose, swooping strokes
- Decorate with fresh whole strawberries on top, refrigerate for at least 30 minutes before slicing, and serve cold for the cleanest, most beautiful slices
Strawberry Chocolate Cake Variations
Mia’s “More Strawberries Please” Birthday Version
Mia’s birthday request never changes. She wants extra strawberry filling between every single layer, extra fresh strawberries on top, and what she calls “the pink frosting all the way down the sides so you can see it from across the room.” For her version, I make one and a half batches of the filling and use three cake layers instead of two by slicing one layer in half horizontally. It is a tall, dramatic, unmistakably Mia kind of cake, and she has asked for it every year since she was four.
Ben’s “Make It a Sheet Cake” Version
Ben has very practical opinions about cake. He thinks round layer cakes are “too complicated to cut” and once asked if we could “just make it flat.” He is not wrong that a sheet cake version of this recipe is significantly less stressful to assemble. Pour the batter into a greased 9×13 inch pan; bake for 35 to 38 minutes; cool completely; spread the strawberry filling across the top; and pile on the whipped frosting. It tastes identical, and nobody has to worry about anything leaning.
The Dark Chocolate Strawberry Celebration Version
For the times when this cake needs to show up to a dinner party or a birthday that deserves something extra, I add a simple dark chocolate ganache drip around the top edge before the fresh strawberries go on. Heat equal parts heavy cream and finely chopped dark chocolate until smooth; let it cool for ten minutes until slightly thickened, then spoon it slowly around the edge of the frosted cake and let it drip naturally down the sides. It looks like it came from a bakery and takes about five minutes.
Substitutions
Buttermilk to regular milk plus vinegar: If you do not have buttermilk, add one tablespoon of white vinegar or lemon juice to a measuring cup and fill to the one-cup line with regular whole milk. Let it sit for five minutes until it curdles slightly. It works exactly the same way in the batter and gives you the same tender crumb.
Hot coffee to hot water: The coffee does not make the cake taste like coffee; it deepens and intensifies the chocolate flavor. If you prefer to skip it entirely, hot water works fine and still blooms the cocoa beautifully. The flavor will be slightly less complex but still deeply chocolatey and delicious.
Freeze-dried strawberries to strawberry jam: If you cannot find freeze-dried strawberries, you can fold two tablespoons of good-quality strawberry jam into the whipped cream instead. The frosting will be slightly less stable and a paler pink, but the flavor is lovely. Add the jam after the cream has started to thicken so it does not deflate the whole batch.
Fresh strawberry filling to store-bought jam: On the days when making the filling from scratch feels like one step too many, a good quality strawberry preserve spread straight from the jar works perfectly well between the layers. Warm it slightly so it spreads easily and let it cool back down before stacking. Nobody at your table will know the difference.
Equipment
- Two 9-inch round cake pans
- Parchment paper circles for lining the pans
- Stand mixer or hand mixer with whisk attachment
- Large mixing bowl for the cake batter
- Small saucepan for the strawberry filling
- Small mixing bowl for the cornstarch slurry
- Chilled large bowl for whipping the frosting
- Wire cooling rack
- Offset spatula for frosting
- Cake stand or flat serving plate
- Food processor or zip-lock bag and rolling pin for the freeze-dried strawberries
- Toothpick for testing doneness
- Kitchen scale (optional but helpful for even layers)
Storage Tips
Make Ahead
- The chocolate cake layers can be baked up to 2 days ahead, wrapped tightly in plastic wrap, and stored at room temperature or in the fridge until you are ready to assemble
- The strawberry filling can be made up to 3 days ahead and stored in a sealed jar in the fridge; bring it to room temperature and stir well before using
- Make the strawberry whipped frosting the same day you plan to frost and serve the cake for the best texture and stability
Refrigerator
- Store the assembled cake covered loosely in the fridge for up to 3 days; the frosting holds its shape beautifully when kept cold
- Slice only what you plan to serve and leave the rest of the cake whole in the fridge with the cut side pressed against a piece of plastic wrap to prevent it from drying out
- Let refrigerated slices sit at room temperature for 10 minutes before serving so the cake layers soften slightly back to that perfect fudgy texture
Freezing
- The unfrosted cake layers freeze beautifully for up to 2 months; wrap each layer individually in plastic wrap and then in foil before freezing
- Thaw frozen cake layers overnight in the fridge still wrapped, then bring to room temperature before assembling and frosting
- Do not freeze the assembled cake with the whipped frosting, as it will weep and lose its texture when thawed
Reheating
- This cake is served cold or at room temperature and does not need reheating
- If a slice has been in the fridge, let it sit out for 10 to 15 minutes before eating for the best texture
- A cold slice with a warm cup of coffee is honestly the only way to eat leftover chocolate cake and I will not be taking questions on that
Family Secret Worth Sharing
My mom never used anything other than hot coffee in her chocolate cake batter, and I spent years thinking it was just a quirk of hers until I tried making it with hot water one day and understood immediately. The coffee version tasted like it had a third dimension the water version simply did not have. She always said good chocolate cake should taste like it is trying very hard to be chocolate, and coffee is what makes it try that hard. I told Ben this while we were baking one afternoon, and he thought about it for a moment and then said, “So the cake is secretly a coffee cake?” I told him that was close enough. He seemed satisfied. Mia, who had been listening from the counter, announced that she does not drink coffee and asked if her slice would still be okay. It was more than okay. It always is.
Troubleshooting FAQs
Why did my cake layers dome up in the middle instead of baking flat?
This happens when the oven is too hot or the batter is overmixed. Make sure your oven temperature is accurate with an oven thermometer, and mix the batter only until the ingredients are just combined. You can also use baking strips soaked in water wrapped around the outside of the pans to help the layers bake more evenly and come out flat from the start.
My strawberry filling is too runny and keeps sliding out from between the layers. What do I do?
The filling needs to be completely cool and thick before it goes between the layers. If it is still runny after cooling, return it to the saucepan and cook for another two minutes with an extra half teaspoon of cornstarch dissolved in cold water. A thick, jammy filling that holds its shape on a spoon is what you are after. Never use a warm filling on a cake.
The whipped frosting deflated and turned soupy when I was spreading it. What went wrong?
Three things cause this: cream that was not cold enough, a bowl that was not chilled, or overworking the frosting after it was whipped. The cream and the bowl both need to be very cold before you start. Once the frosting reaches stiff peaks, stop the mixer immediately and use it right away or keep it in the fridge. Do not try to re-whip deflated cream frosting, as it will not recover.
Can I make this cake without a stand mixer?
Absolutely. The cake batter is thin enough to mix by hand with a whisk with no trouble at all. For the whipped frosting, a hand mixer works just as well as a stand mixer; just make sure your bowl and beaters are very cold before you start. Whipping cream by hand is technically possible but takes about ten minutes of serious effort, so the hand mixer is worth it here.
The Cake That Fixed Everything
The leaning tower of chocolate cake that started this whole journey is now a family story we tell at every birthday. Ben brings it up every single time I make this, usually while reaching for his second slice. Mia just stands next to the cake stand with a fork, waiting. This strawberry chocolate cake has become the most requested thing I bake, and if you love a showstopping dessert that is equally at home on a celebration table or a random Wednesday, this is absolutely the recipe to save. It sits beautifully alongside our brown butter brookies as a go-to for anyone who wants a dessert that genuinely impresses, and the strawberry-chocolate combination is every bit as classic and crowd-pleasing as our beloved mini pineapple cakes that disappear just as fast. If you are on a baking streak and want something equally beautiful but a little more unexpected, our rhubarb cake recipe is the next one to bookmark. For the days when you want something rich, fudgy, and just a little bit celebratory, this cake is the answer, and it pairs beautifully with a quiet kitchen, a good cup of coffee, and the very satisfying knowledge that it is standing perfectly straight on the stand. I checked. Twice.
Don’t forget to snap a picture of your strawberry chocolate cake before that… (trust me, it will disappear quickly) and leave a rating below. We’d love to hear how this strawberry chocolate cake becomes part of your family celebration story.