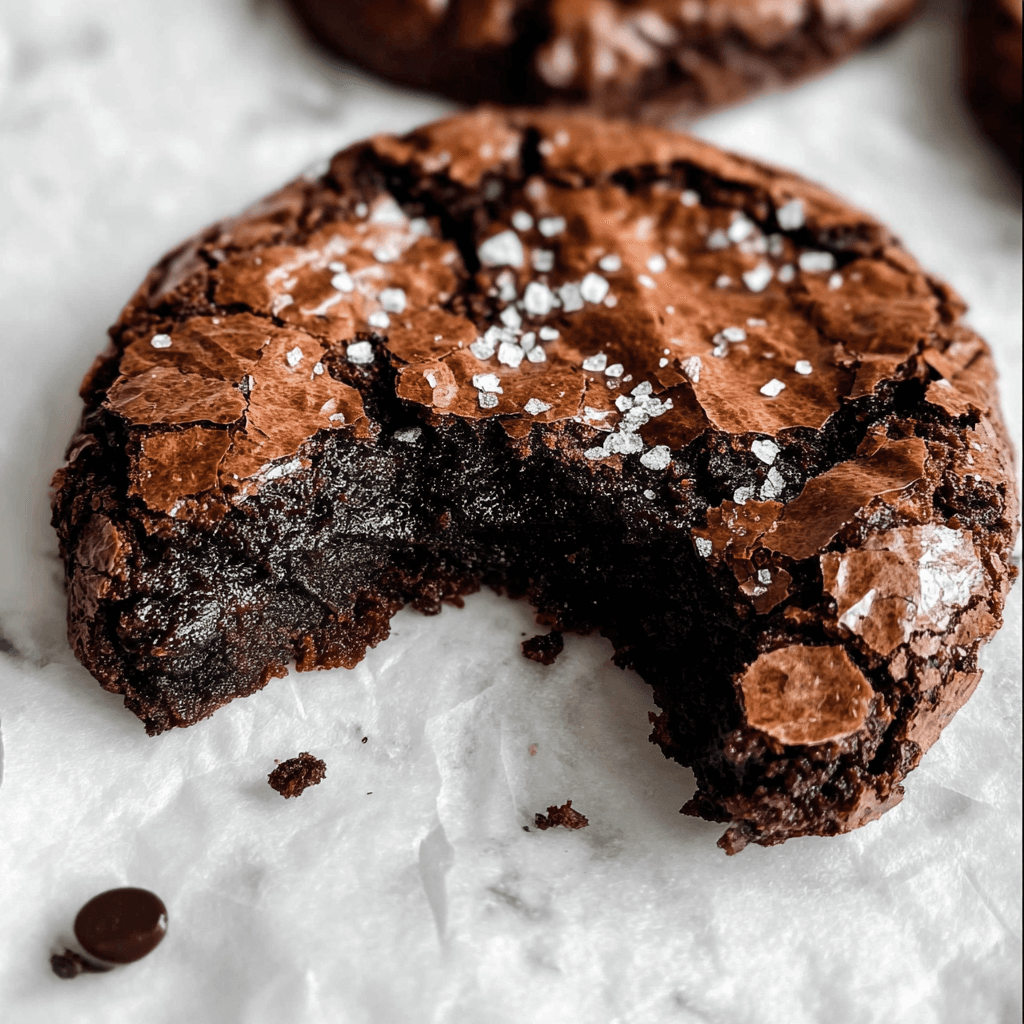
I forgot the timer. Ben had asked a very long question about volcanoes, and I completely lost track. When I finally pulled the pan out, I was convinced I had ruined everything. But they had set into crinkle-topped, fudgy-centered, chewy-edged cookies that Mia ate in approximately four seconds. That happy accident is exactly how these fudgy chewy browkies became a permanent fixture in our house.
Why This Recipe Is Special
The whole point of a brookie is that you cannot decide if you want a brownie or a cookie, so you simply refuse to choose. These have the shiny, crackled top of a brownie, the fudgy dark center that pulls apart in the most satisfying way, and just enough chew around the edges to remind you that yes, this is technically a cookie. They come together in one bowl with no mixer required, which means both kids can be involved from the very start. Mia thinks that makes them her invention. I have stopped correcting her.
How To Make Fudgy Chewy Browkies
The batch that actually worked was a Sunday afternoon situation where I had leftover chocolate from a baking project and two kids who were bored enough to be genuinely helpful. Mia was in charge of measuring the sugar, which she took so seriously she leveled it three times. Ben stirred the melted chocolate with the focused expression of someone doing surgery. When I folded the flour in and the batter went thick and glossy and deeply dark, he leaned over the bowl and said, very quietly, “That smells like the inside of a bakery.” He was not wrong.
The thing that makes these browkies work every single time is whipping the eggs and sugar together properly before anything else goes in. That step creates the signature shiny crackled top that makes everyone at the table reach for the pan before it has properly cooled. It takes about three to four minutes with a hand mixer, and it is the single most important thing you can do for this recipe. Ben now considers himself the official egg whipper, which means he stands at the bowl with tremendous authority and announces when it looks “fluffy enough.”
Main Ingredients
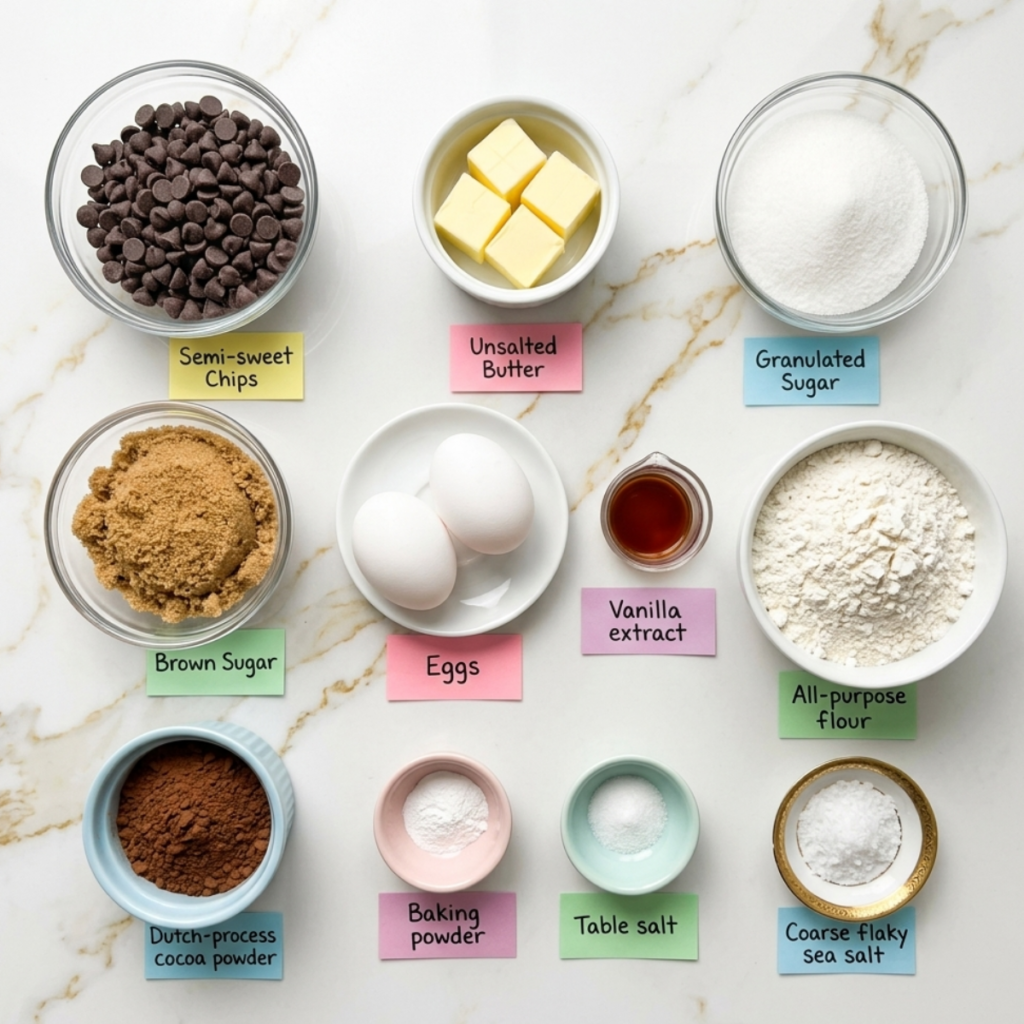
- 1 cup semi-sweet chocolate chips or chopped dark chocolate – Use good quality chocolate here; it is the entire flavor foundation of the browkie
- 1/2 cup unsalted butter, cut into pieces – Melted together with the chocolate for that rich, fudgy base
- 3/4 cup granulated sugar – Gives sweetness and helps create the shiny crackled top
- 1/4 cup brown sugar, packed – Adds moisture and that deep caramel chew around the edges
- 2 large eggs, room temperature – Both eggs go in together and get whipped until pale and thick
- 1 teaspoon vanilla extract – Rounds out the chocolate flavor beautifully
- 1/2 cup all-purpose flour – Just enough to hold the cookies together without making them cakey
- 1/4 cup Dutch-process cocoa powder – Deepens the chocolate flavor and gives that dark, almost black brownie color
- 1/2 teaspoon baking powder – A small lift so the cookies spread just right without puffing up
- 1/4 teaspoon salt – Enhances all the chocolate; do not leave it out
- 1/2 cup chocolate chips, for folding in – Extra melty pockets of chocolate in every single bite
- Flaky sea salt, for topping – Optional but genuinely transformative; the contrast against the sweet chocolate is everything
Step-by-Step Instructions
Step 1: Melt the Chocolate and Butter
- Combine the chocolate chips and butter in a heatproof bowl set over a saucepan of barely simmering water, making sure the bottom of the bowl does not touch the water
- Stir gently and constantly until both are fully melted and the mixture is smooth, glossy, and completely combined
- Remove from the heat and let the chocolate mixture cool for 8 to 10 minutes until it is warm but no longer hot to the touch
- Alternatively, melt in the microwave in 30-second intervals, stirring between each, until just smooth; do not overheat or the chocolate will seize
Step 2: Whip the Eggs and Sugar
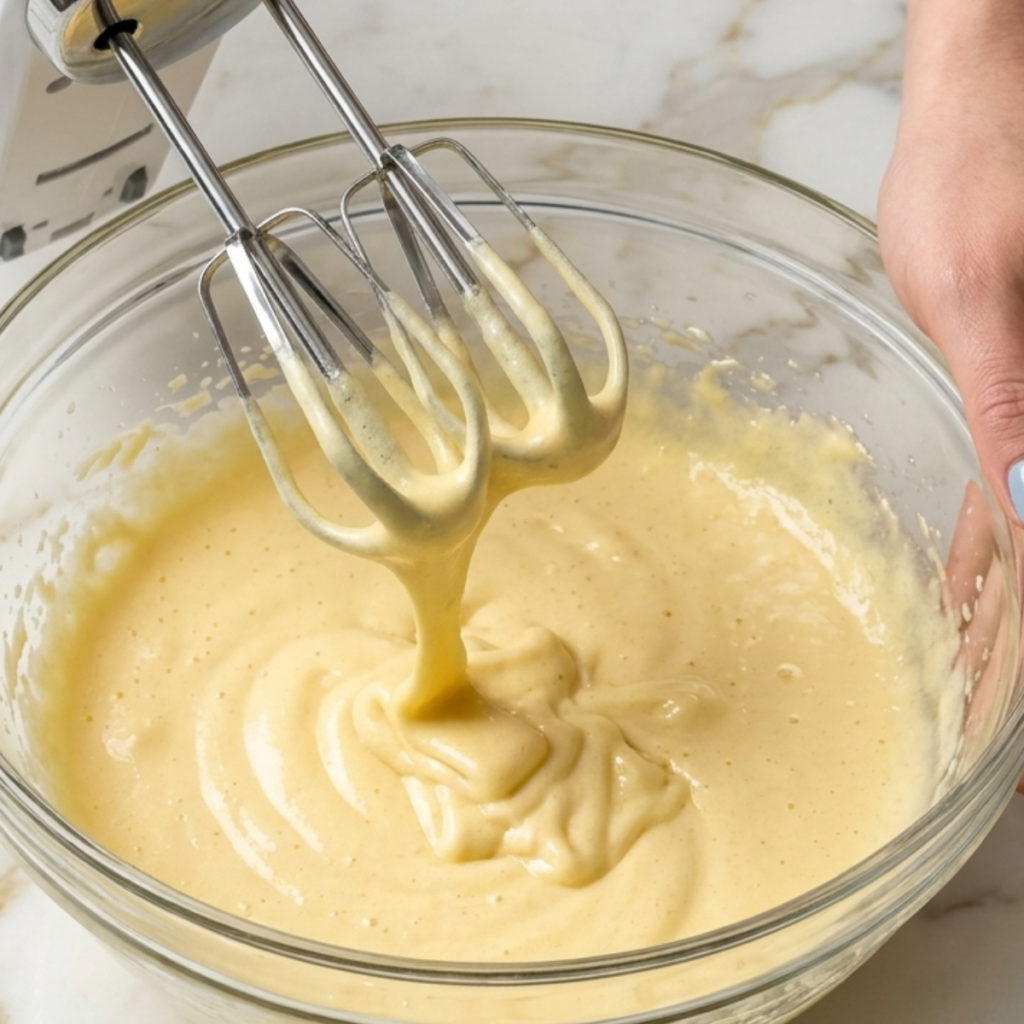
- Add both sugars to a large mixing bowl, then crack in the eggs and add the vanilla extract
- Beat with a hand mixer on medium-high speed for 3 to 4 minutes until the mixture is pale, thick, and has roughly doubled in volume
- This step is not optional; the whipped eggs create the signature shiny crackled top that makes browkies look like browkies
- Pour the cooled chocolate mixture into the egg mixture and fold gently with a spatula until just combined and no streaks remain
Step 3: Fold in the Dry Ingredients
- Sift the flour, cocoa powder, baking powder, and salt directly over the chocolate mixture in the bowl
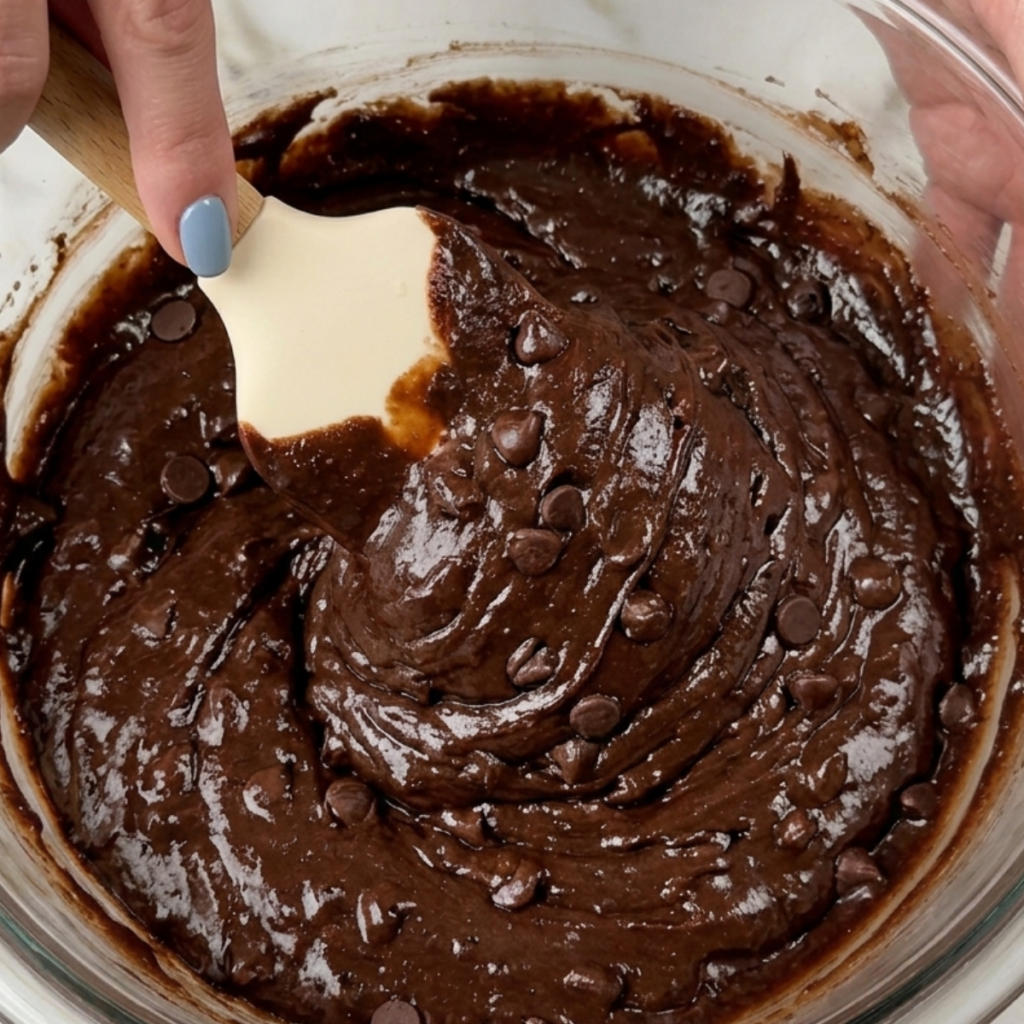
- Fold with a spatula using slow, deliberate strokes from the bottom of the bowl upward until no dry streaks remain; do not overmix
- Fold in the extra chocolate chips so they are evenly distributed throughout the thick, glossy batter
- Let the batter rest for 10 minutes at room temperature; it will thicken slightly and become easier to scoop into neat rounds
Step 4: Bake and Finish
- Preheat your oven to 350 degrees F and line two baking sheets with parchment paper; scoop the batter into rounds about 2 tablespoons each, spacing them 3 inches apart
- Sprinkle a small pinch of flaky sea salt over the top of each unbaked brownie before they go in the oven
- Bake for 10 to 12 minutes until the tops are set and crinkled and the edges look firm but the centers still look slightly underdone
- Let the browkies cool on the pan for at least 10 minutes before moving them; they firm up as they cool and the centers set into that perfect fudgy texture
Fudgy Chewy Browkies Variations
Mia’s “Extra Chocolate Chips” Version
Mia has one position on chocolate chips in baked goods, and that position is “more.” Always more. She once told me very seriously that she could see “empty spots” in a batch of cookies and that it was a problem that needed solving. For Mia’s version, double the fold-in chocolate chips to a full cup and press a few extra chips on top of each scoop before baking. The browkies come out with visible pools of melted chocolate on top that she finds deeply satisfying. I find her deeply satisfying too, honestly.
Ben’s “Sea Salt and Espresso” Version
Ben discovered that espresso makes chocolate taste more like chocolate during the strawberry cake baking session, and he has been applying that information to every chocolate recipe ever since. For a more grown-up, intensely flavored brownie, stir one teaspoon of instant espresso powder into the warm melted chocolate before it goes into the batter. The espresso does not make them taste like coffee; it makes them taste like the best version of themselves. Then the flaky sea salt on top seals the whole thing, and Ben calls it “the fancy one.”
The Peanut Butter Swirl Version
This one happened by accident when Mia found the peanut butter jar and decided to “help” before I could redirect her. Drop half a teaspoon of creamy peanut butter on top of each brownie round right before they go into the oven, then use a toothpick to swirl it once through the top. It creates this beautiful marbled surface and the peanut butter bakes into a slightly nutty, salty layer that sits right underneath the crinkled chocolate crust. Both kids now request this version specifically, and I pretend it was planned all along.
Substitutions
Semi-sweet chocolate to dark chocolate: Dark chocolate at 70 percent or higher gives a less sweet, more intensely bitter chocolate brownie that is genuinely excellent for anyone who loves a bolder flavor. The texture stays exactly the same. Milk chocolate works too but makes a noticeably sweeter, softer result, and the crinkled top is less pronounced.
Unsalted butter to coconut oil: Refined coconut oil (the kind without a strong coconut flavor) is a solid dairy-free swap here. Use the same quantity melted. The browkies will be very slightly less rich but still deeply fudgy, and the texture difference is minimal enough that most people will not notice.
All-purpose flour to a 1:1 gluten-free flour blend: A good quality 1:1 gluten-free baking flour works well in this recipe since there is so little flour in the mix to begin with. The browkies may spread slightly more, so let them cool completely on the pan before lifting. Bob’s Red Mill 1:1 is the one I have tested, and it works beautifully.
Dutch-process cocoa to natural cocoa powder: Natural cocoa will work here, but the color will be a lighter, more reddish brown, and the flavor will be slightly less deep. If using natural cocoa, add a small pinch of baking soda alongside the baking powder to help with the rise since natural cocoa is more acidic than Dutch-process.
Equipment
- Two large baking sheets
- Parchment paper for lining the baking sheets
- Heatproof bowl for melting the chocolate (or microwave-safe bowl)
- Small saucepan for the double boiler method
- Large mixing bowl for the egg and sugar mixture
- Hand mixer or stand mixer with whisk attachment
- Rubber spatula for folding
- Fine mesh sieve or sifter for the dry ingredients
- Cookie scoop or two tablespoons for portioning
- Wire cooling rack
- Kitchen timer (extremely non-negotiable after my volcano conversation incident)
Storage Tips
Make Ahead
- The browkie batter can be made up to 24 hours ahead, covered tightly, and stored in the fridge; let it sit at room temperature for 20 minutes before scooping so it softens enough to portion
- Scooped unbaked browkie rounds can be frozen on a baking sheet, then transferred to a freezer bag and baked straight from frozen; just add 2 to 3 extra minutes to the bake time
- Baked browkies can be made a day ahead and stored covered at room temperature; they are arguably even better on day two when the centers have fully set
Refrigerator
- Store baked browkies in an airtight container at room temperature for up to 4 days; the refrigerator actually dries them out and is not recommended
- If you live somewhere very warm and the browkies are softening too much, a brief spell in the fridge is fine but bring them back to room temperature before eating
- Layer browkies between sheets of parchment paper if stacking in a container to prevent the sticky tops from bonding together
Freezing
- Baked browkies freeze beautifully for up to 2 months; wrap each one individually in plastic wrap and then store in a freezer-safe bag
- Thaw at room temperature for about 30 minutes and they come back almost exactly as they were when freshly baked
- Do not microwave to thaw unless you want a molten puddle; room temperature thawing is the only way that preserves the fudgy texture
Reheating
- A fully cooled browkie warmed in a 300 degree F oven for 4 to 5 minutes comes back to life in the most incredible way; the center goes gooey again and the top re-crisps slightly
- Microwave reheating works at 50 percent power for 15 to 20 seconds; longer than that and the chocolate chips will overheat and the center will go dry
- Serve a warm browkie with a cold scoop of vanilla ice cream and nobody in your house will be able to talk for approximately three minutes
Family Secret Worth Sharing
The real secret to the crinkled top that makes these browkies look like they came from a fancy bakery display case is something so simple that I almost did not believe it the first time I tried it. You have to let the batter rest. After everything is mixed together, just leave it alone for ten minutes. The batter thickens, the chocolate sets slightly, and when the cookies hit the hot oven, the surface cracks and crinkles in that perfect way while the inside stays dark and fudgy. Ben discovered this while he was waiting impatiently to lick the spatula and decided the ten minutes was “the most important part of the whole recipe.” He is not wrong. He is also not getting the spatula until the timer goes off.
Troubleshooting FAQs
My browkies spread into flat puddles instead of staying thick and round. What happened?
This almost always comes down to one of three things: the chocolate mixture was still too warm when it went into the eggs, the batter was not rested before scooping, or the baking sheets were warm from a previous batch. Make sure the melted chocolate cools for a full 8 to 10 minutes, rest the batter for 10 minutes after mixing, and always use a cool baking sheet. A warm sheet makes the batter start spreading before it even hits the oven.
Why do my browkies not have the shiny crinkled top?
The crinkled top comes entirely from whipping the eggs and sugar long enough. Three to four minutes at medium-high speed is the minimum. If you rush this step or do it by hand, the batter will not trap enough air, and the surface will bake up flat and matte instead of shiny and crackled. It is the one step in this recipe that genuinely cannot be shortened.
The centers are still gooey after the bake time. Are they done?
Probably yes. The centers should look slightly underdone when they come out of the oven; that is exactly right. They will continue cooking from the residual heat of the pan for the first five minutes out of the oven and then firm up as they cool. If you bake them until the centers look fully set in the oven, they will be dry and cakey by the time they cool. Pull them early and trust the process.
Can I double this recipe?
Absolutely, and I do it regularly. Double everything exactly and bake in multiple batches on separate sheets rather than crowding two sheets worth of cookies into the oven at once. Crowded pans and uneven heat are the enemies of a good browkie. Rotate the sheets halfway through baking if your oven has any hot spots, which most home ovens do.
One Bowl, Two Kids, Zero Leftovers
Every time I make these, the same thing happens. The browkies come out of the oven looking absolutely perfect with their crinkled tops and glossy centers. I set them on the rack to cool, and then I turn around for approximately forty-five seconds and find Mia already holding one with a completely innocent expression. Ben waits exactly the full ten minutes with the self-control of someone who has been burned before, literally, and then eats three in a row. If you love a one-bowl beginner baking recipe that delivers maximum drama for minimum effort, this is the one to save right alongside our healthy brownie recipe for the days you want something a little lighter. For anyone who loves the brownie-cookie crossover world, our brown butter brookies are the next logical step, and they are just as impossible to stop eating. And on the weeks when I want to put together a full dessert spread that covers every base, these browkies land perfectly next to our banana bread recipe as a crowd-pleaser that disappears before anyone can ask what else is on the table.
Don’t forget to snap a picture of your fudgy chewy browkies before that… (trust me, it will disappear quickly!), and leave a rating below. We’d love to hear how this fudgy chewy browkies recipe becomes part of your family baking story.