The first time I made a healthy brownie recipe, I used black beans. I blended them up and baked them proudly, and Jake took one bite, put it down, and said, “Mum, these taste like a garden.” Emma just looked at the plate and walked away. I ate the whole tray myself out of stubbornness and started over the next morning with an entirely different approach.
Why This Recipe Is Special
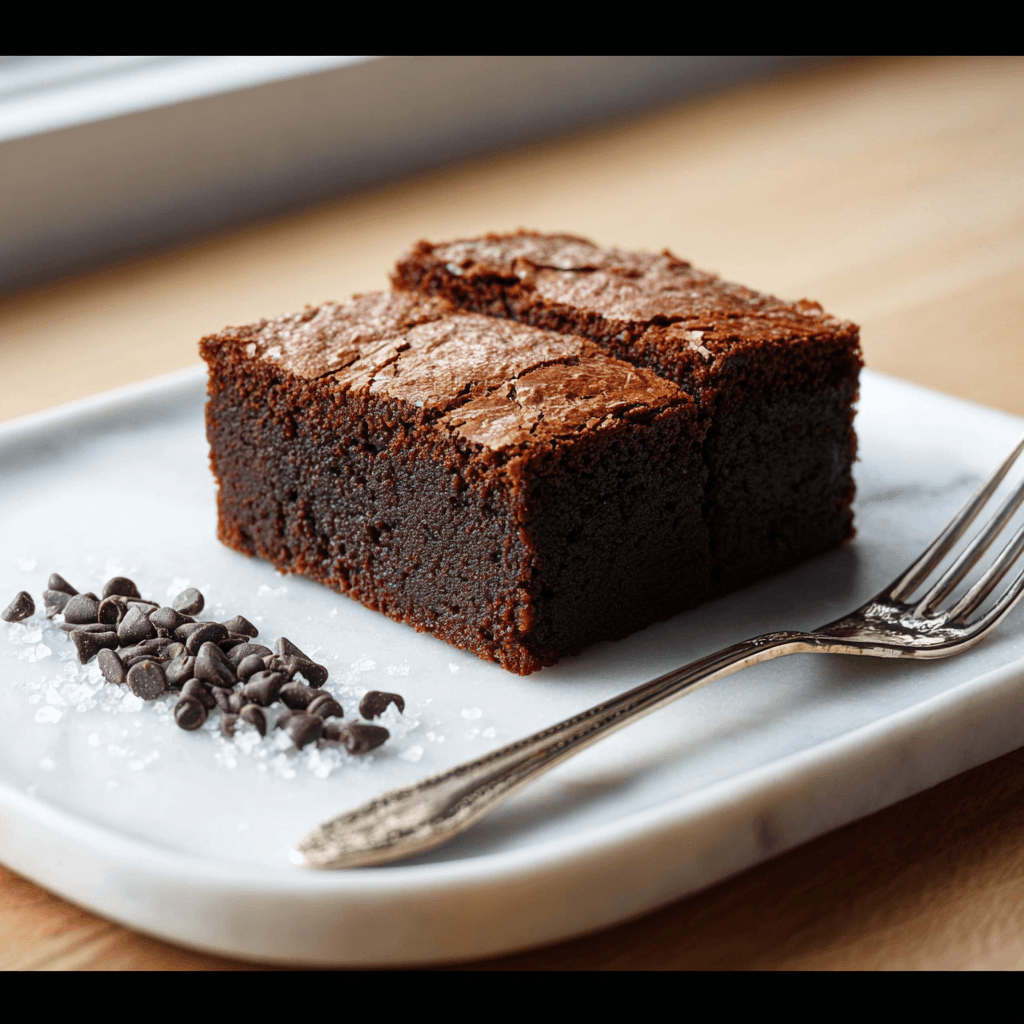
This is the healthy brownie recipe that actually tastes like a brownie. Not a health food that pretends to be one. Not something you eat with a resigned expression and tell yourself is fine. These have a proper crinkle top, a fudgy center, and that deep chocolate richness that makes you close your eyes for a second when you take a bite. The secret is swapping refined ingredients for better ones without stripping out the things that make brownies worth eating. Coconut oil instead of butter, maple syrup instead of white sugar, and almond flour instead of plain flour. Three swaps. That is all the recipe is.
How To Make Healthy Brownies
After the bean incident, I spent two weeks testing versions until I landed on this one. Jake came into the kitchen for the third test batch, sniffed the air, and said “that actually smells like brownies.” High praise. Emma positioned herself by the oven for the last ten minutes of baking time with the focused energy of someone awaiting very important news. When I cut the first square and the center was still fudgy and glossy and entirely brownie-shaped, she grabbed it before I could say a word and ate it standing at the counter. “These are the good ones,” she confirmed, with absolute authority. They are. They really are.

Main Ingredients
- 3 large eggs, room temperature: The whole structure. They create the crinkle top when whisked properly with the maple syrup.
- 1/2 cup coconut oil, melted and cooled: Replaces butter entirely. Refined coconut oil has no coconut flavor if you prefer neutral.
- 1/2 cup pure maple syrup: Real maple only. It sweetens gently and adds a subtle depth that white sugar cannot.
- 2 tsp pure vanilla extract: Real vanilla matters here. It smooths out the cocoa and rounds the whole flavor.
- 3/4 cup unsweetened cocoa powder Dutch-process gives the deepest, most fudgy result. Do not use hot drink powder.
- 1 cup blanched almond flour: Finely ground blanched almond flour only not almond meal, which is coarser and drier.
- 1/2 tsp baking powder + 1/4 tsp salt: Just enough lift without making these cakey. The salt is as important as the chocolate.
- 1/3 cup dark chocolate chips (70%+): Optional but strongly advised. They melt into fudgy pockets throughout.
Step-by-Step Instructions
Step 1: Preheat and Prep Your Pan
- Preheat oven to 350°F (175°C) and line an 8×8 inch baking pan with parchment, leaving an overhang on two sides.
- Melt the coconut oil gently in a small saucepan or in the microwave in 20-second bursts; do not let it get hot.
- Allow the melted coconut oil to cool for 3 to 4 minutes before using; hot oil will scramble your eggs when combined.
- Set the lined pan aside on a flat, level surface so you can pour the batter straight in without adjusting.
Step 2: Build the Batter
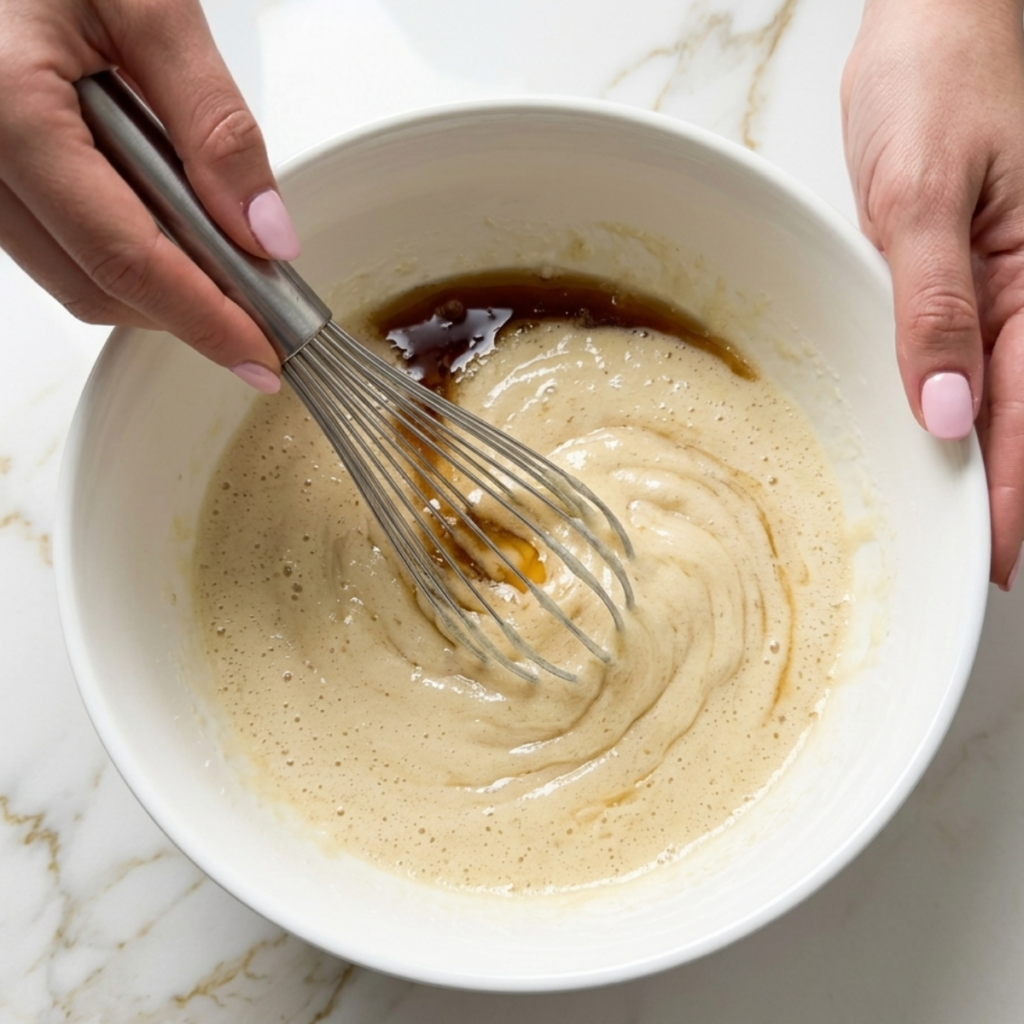
- In a large bowl, whisk the eggs, maple syrup, cooled coconut oil, and vanilla together for a full 2 minutes until the mixture lightens slightly in color and looks glossy.
- Sift the cocoa powder directly into the wet mixture sifting removes lumps and means you do not spend the next five minutes chasing them with a whisk.
- Add the almond flour, baking powder, and salt, and fold gently with a rubber spatula until just combined; do not overmix.
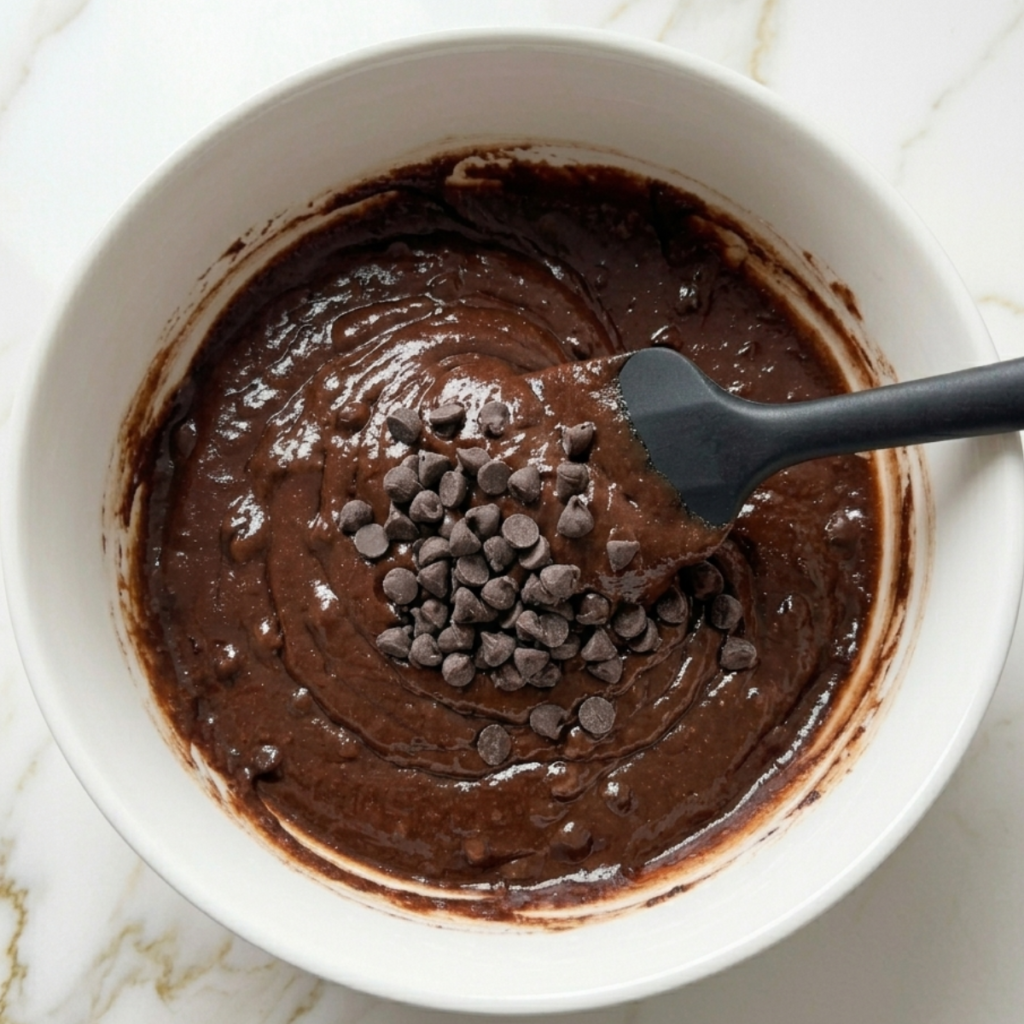
- Fold in the chocolate chips with 3 or 4 gentle strokes; the batter will be thick, glossy, and considerably more promising than a garden.
Step 3: Bake
- Pour and spread the batter evenly into the prepared pan a small offset spatula is ideal, but the back of a spoon works perfectly well.
- Bake for 20 to 24 minutes; the top should look set and matte, with the edges pulling very slightly from the sides of the pan.
- A toothpick inserted into the center should come out with a few moist, fudgy crumbs wet batter means more time; completely clean means slightly overbaked.
- Remember that these will continue to firm up as they cool, so pulling them a minute early is always the right instinct.
Step 4: Cool and Slice
- Allow to cool in the pan for at least 20 full minutes before attempting to lift or slice; the structure needs that time.
- Lift out using the parchment overhang and transfer to a cutting board.
- Slice with a sharp knife, wiping the blade clean between cuts for neat, clean edges.
- The squares will firm up further as they cool to room temperature, genuinely being better 30 minutes out of the oven than at 5 minutes.
Healthy Brownies Variations
The Espresso and Sea Salt Version (My Absolute Favourite)
This is what I make when I want something that feels genuinely sophisticated rather than just quietly nutritious. Add one teaspoon of instant espresso powder to the wet ingredients; it deepens the chocolate flavor in a way that is almost startling, without tasting at all like coffee. Then scatter a generous pinch of flaky sea salt across the top before baking. The salt crystals catch the light, and the flavor combination is the kind that makes people ask what is in these?” and then immediately ask for the second one.
Jake’s Peanut Butter Marble (Non-Negotiable on Weekends)
Jake discovered that peanut butter swirled into anything becomes his favorite version of that thing, and he is correct. Pour the batter into the pan, then drop four or five generous tablespoons of natural peanut butter across the surface. Drag a butter knife through in slow, wide strokes to create a rough marble pattern. The peanut butter bakes in and becomes dense and salty against the dark chocolate. Jake considers this his recipe. He did not develop this recipe. He suggested it once, and I tested it four times to get it right. I have given him full credit anyway.
Emma’s Raspberry Swirl (The “Pretty One”)
Emma’s contribution was aesthetic rather than flavor-based: she wanted them to be prettier. She pressed eight or nine fresh raspberries into the top of the batter before baking and scattered a small handful of extra chocolate chips around them. The raspberries sink slightly as they bake, leaving little jewel-pink pockets in the dark chocolate. Emma presents these to anyone who visits with the energy of someone unveiling something significant. She is not wrong; they do look extraordinarily good, and the sharp raspberry against the rich chocolate is exactly as good as it sounds.
Substitutions
- Almond flour → Oat flour works well and gives a slightly more cake-like result. Use the same quantity. For nut-free, sunflower seed flour is a reliable 1:1 swap. Regular all-purpose flour also works, but you lose the grain-free benefit.
- Maple syrup → Honey is the closest swap in the same quantity, slightly denser, with a gentle floral note. Coconut sugar dissolved in a tablespoon of warm water also works; use 1/2 cup and adjust to taste.
- Coconut oil → Melted unsalted butter works as a direct swap for a more traditional brownie flavor. For dairy-free, neutral avocado oil works; use 6 tablespoons since it is more liquid than solid coconut oil.
- Eggs → For a vegan version, two flax eggs (2 tablespoons ground flaxseed mixed with 6 tablespoons water, rested 10 minutes) plus one tablespoon of extra coconut oil gives a dense, fudgy result. The crinkle top will not form, but the flavor holds up very well.
Equipment
- 8×8 inch baking pan
- Parchment paper
- Large mixing bowl
- Whisk
- Rubber spatula
- Fine mesh sieve (for cocoa powder)
- Small offset spatula
- Sharp knife for slicing
- Cooling rack
- Toothpick or skewer
Storage Tips
Make Ahead
- Brownies can be baked up to 2 days before serving; they improve as they sit.
- Store whole or sliced; the cut surface benefits from being pressed against parchment if stored sliced.
- Batter can be made and refrigerated for up to 24 hours before baking bring to room temperature first.
Refrigerator
- Store in an airtight container at room temperature for 4 days or in the fridge for up to 7 days.
- Cold brownies are actually excellent; the texture firms into something almost truffle-like.
- Let refrigerated brownies sit at room temperature for 15 minutes before serving for best texture.
Freezing
- Freeze individual squares wrapped tightly in parchment, then placed in a zip-lock freezer bag.
- Keeps well for up to 3 months; these freeze better than almost any other baked good I make.
- Thaw at room temperature for an hour or in the fridge overnight from frozen.
Reheating
- Microwave a single square for 12 to 15 seconds; it comes back to warm, fudgy life immediately.
- Oven at 300°F for 5 to 6 minutes, covered loosely with foil if reheating several at once.
- Serve warm with a spoonful of natural yogurt for a dessert that feels completely indulgent.
Family Secret Worth Sharing
The crinkle top on a brownie is not luck; it is technique. Those gorgeous, papery, cracked ridges come from one specific step: whisking the eggs and sweetener together properly before anything else goes in. In a traditional brownie, that means dissolving the sugar into warm butter. In this recipe it means whisking the eggs with the maple syrup for a full two minutes until the mixture turns slightly pale and leaves a ribbon when you lift the whisk.
The first time Emma helped me make these, she was in charge of the whisking. She gave it about thirty seconds and declared it done. The top of those brownies came out completely flat and sad. The second batch, I set a timer, and she whisked for the full two minutes, looking deeply put-upon about it. Crinkle top. Perfect. That is the whole secret. She has never skipped the two minutes since, though she does sigh heavily while doing it, which I respect as her right.
Troubleshooting FAQs
My brownies came out dry and cakey. What happened?
Two likely causes: it was overbaked, or the almond flour was packed too tightly when measured. For almond flour, always spoon it into the measuring cup and level it off; never scoop directly from the bag. Pull them the moment the toothpick has moist crumbs rather than waiting for it to come out clean. These are meant to underbake very slightly and firm up as they cool.
My batter looks too thick to spread. Is that normal?
Completely normal almond flour batter is considerably thicker than regular wheat flour batter. Spread it with a small offset spatula or the dampened back of a spoon. If it seems unusually stiff, check that your coconut oil was fully liquid before adding it; partially solid coconut oil will make the batter seize up unevenly.
Can I use cocoa powder from a hot drink mix like Cadbury?
I would really steer you away from this. Drinking chocolate mixes contain added sugar and dried milk, which will throw off the balance of the recipe. Use unsweetened pure Dutch-process cocoa powder for the deepest flavor or natural cocoa if that is what you have. The quality of the cocoa is probably the single most important ingredient in this recipe.
There is no crinkle top on mine. What did I do wrong?
Ask Emma; she knows. The crinkle top comes from fully whisking the eggs and maple syrup together for the full two minutes before adding anything else. Thirty seconds is not enough. Set a timer, whisk properly, and it will happen every single time.
The Brownies That Made the Bean Version Worth Forgetting
Last Saturday I made a double batch of these and put them on the counter to cool. Forty minutes later I came back to find that Emma had eaten two and Jake had eaten three, and there were exactly seven squares left out of sixteen. Neither of them mentioned it. They just walked around looking extremely casual and slightly chocolatey. I said nothing. This is what healthy homemade brownies should be: the kind that disappear without ceremony, that nobody describes as “healthy” when they are eating them because they are just too busy eating them.
These are the kind of healthy baked dessert recipes that earn their place in your permanent rotation not because they are good for a healthy brownie but because they are genuinely, honestly, no-qualification-needed good. Full stop. The kids agree. The bean brownies are never spoken of.
Whether you make these for a lunchbox, a dinner party, a school bake sale where you quietly want to be the parent who brought the best thing, or just for a quiet Tuesday evening when you want something that feels like a proper treat without the aftermath, these are it. The kind of effortless, healthy baking recipes that will not last. They never do.
Don’t forget to snap a picture of your healthy brownies before that first square disappears from the board (trust me, it will disappear quickly!), and leave a rating below. We’d love to hear how this healthy brownie recipe becomes part of your family baking story.
Star rate this recipe and join our cozy healthy baking family.