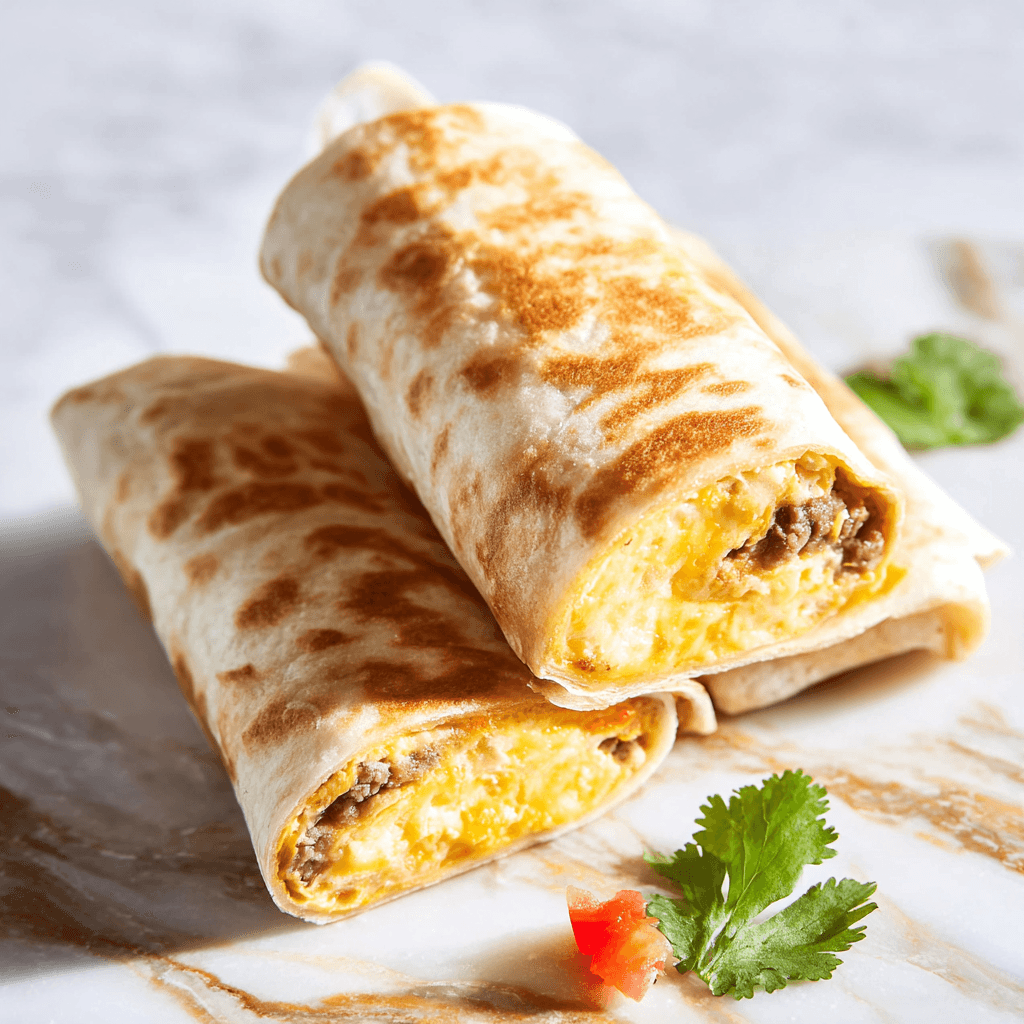
I packed them so full they burst open the moment they hit the skillet. Scrambled egg everywhere. Ben said it looked like a breakfast crime scene. Mia said it smelled good, though, which is a very Mia way of looking at things. That exploding batch taught me the one rolling rule that makes these breakfast burritos stay sealed, crispy, and completely intact every single time.
Why This Recipe Is Special
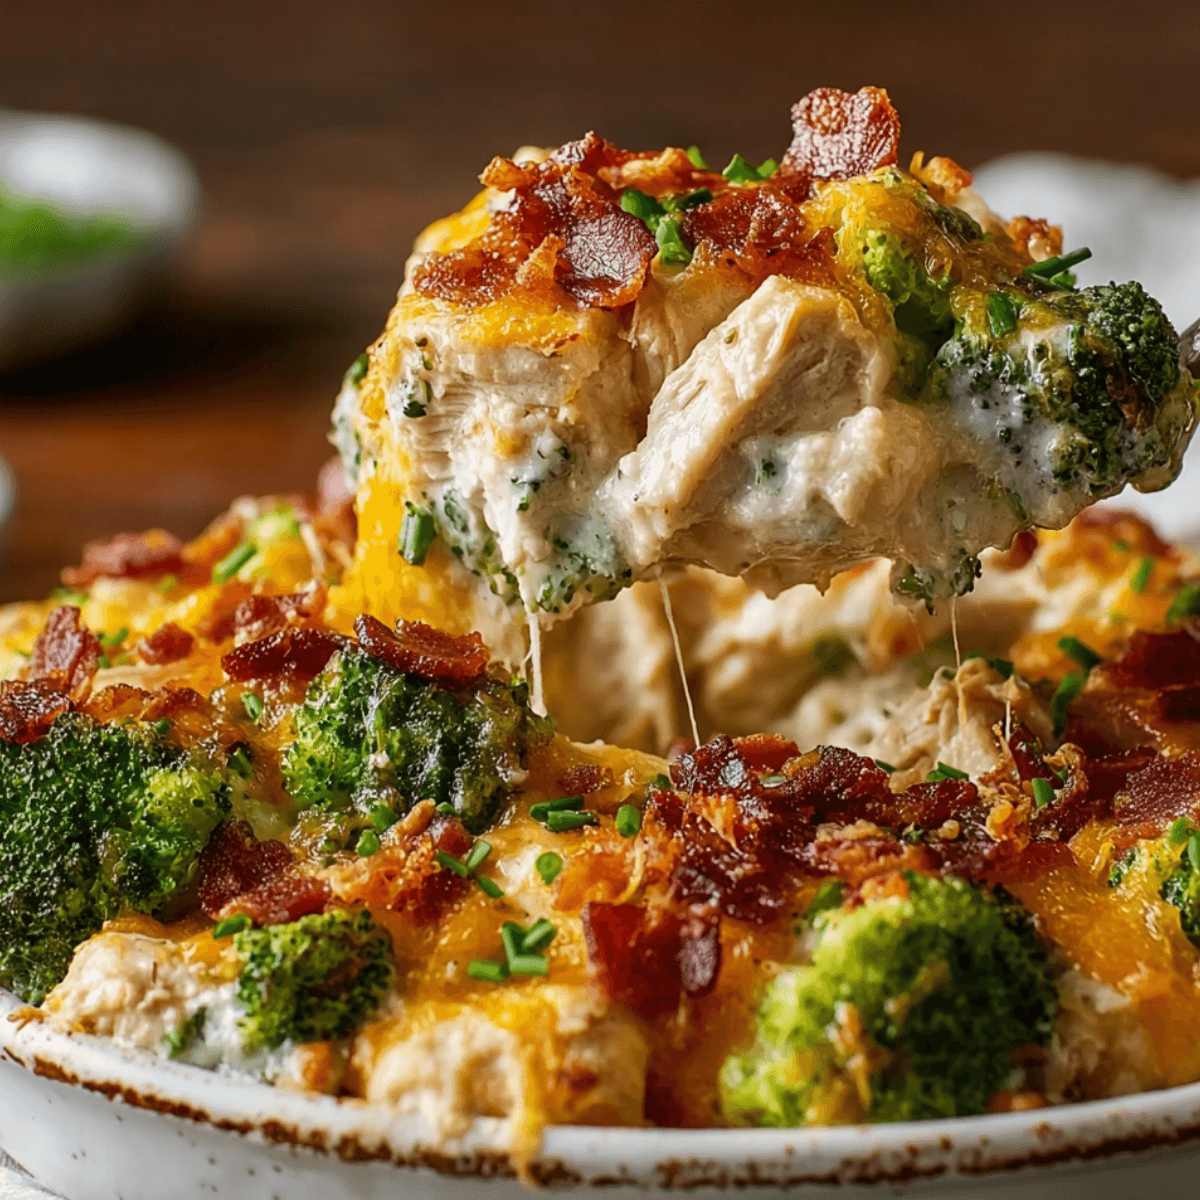
These are the burritos I make on Sunday so Monday through Friday takes care of itself. Fluffy scrambled eggs, seasoned ground beef, roasted red pepper, cheddar cheese, and a seam that gets pan-toasted until it holds closed and stays golden. You can eat one fresh off the skillet or wrap a batch and freeze them for the week ahead. Ben grabs one before school without being asked. Mia asks if there are any left every single morning, whether or not she saw me make them. That kind of dependability from a breakfast recipe is genuinely worth talking about.
How To Make Breakfast Burritos
The successful batch happened on a Sunday morning when both kids decided they were going to help whether I had asked or not. Mia was whisking the eggs with an enthusiasm that got egg on the cabinet door, and she did not notice. Ben was browning the beef and providing a running update on how it smelled, which was “really good, actually really good, okay this is great.” When I laid the first properly filled burrito in the hot skillet seam-side down and heard that satisfying sizzle and watched it go golden, both kids pressed forward, and Ben said “that is what it is supposed to look like.” He was absolutely right.
The rolling lesson that fixed everything was simple: less filling than you think you need, and the fold always goes sides first, then bottom up and over. You press gently to compact the filling slightly before rolling, place it seam-side down immediately in the hot pan, and do not move it for a full sixty seconds so the tortilla seals itself against the heat. The filling holds, the outside goes golden, and nothing explodes. Ben now rolls his own and has gotten very good at the technique, though he still overfills slightly and calls it “a preference.”
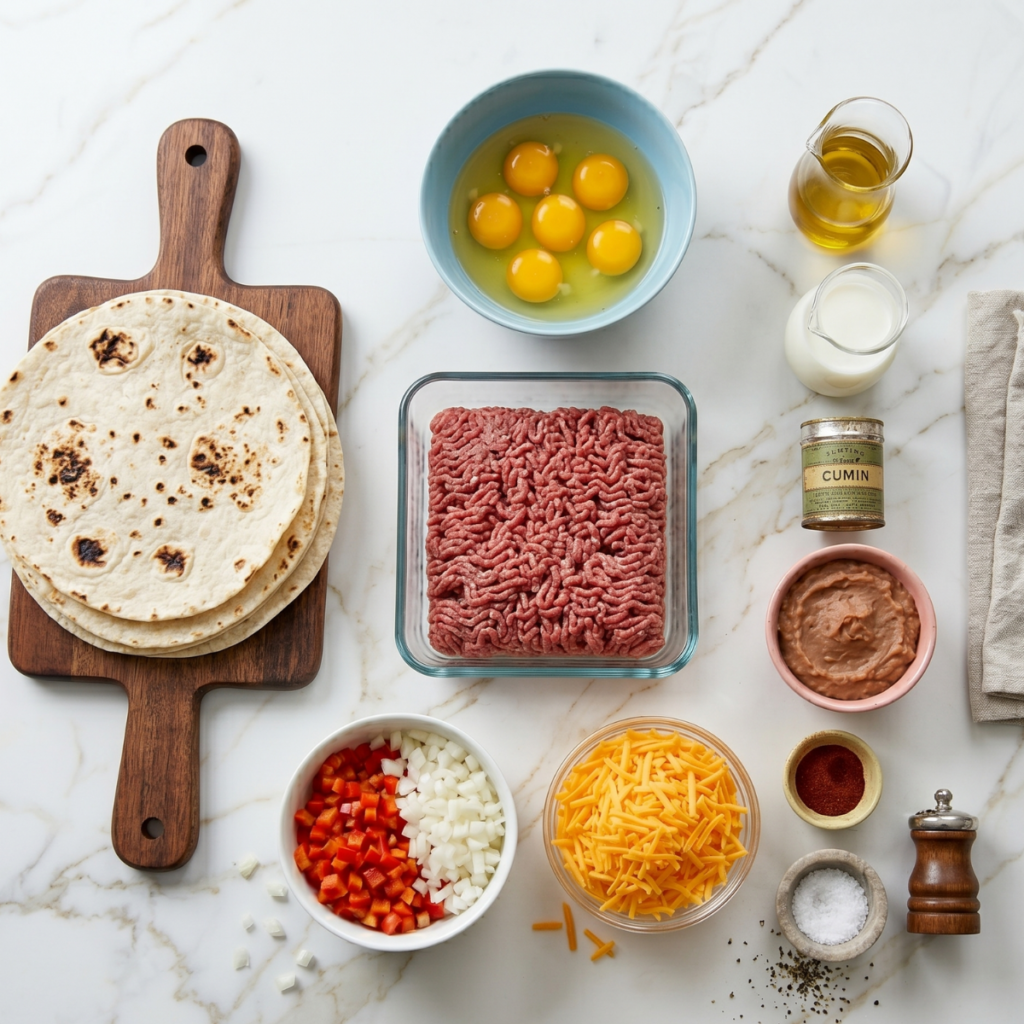
Main Ingredients
- 6 large flour tortillas (10-inch) – Large tortillas give you room to roll without overstuffing; do not use small ones or everything explodes, which I know firsthand
- 6 large eggs – Scrambled low and slow for the softest, most custardy egg base
- 1/2 lb ground beef or breakfast sausage – Cooked and crumbled; the savory backbone of every bite
- 1 red bell pepper, finely diced – Adds sweetness and color; cook it with the meat so it softens fully
- 1 small onion, finely diced – Adds depth and sweetness to the meat mixture
- 1 teaspoon cumin – The warm earthy spice that makes everything taste intentionally seasoned
- 1/2 teaspoon garlic powder – Savory depth without needing to mince anything
- 1/2 teaspoon smoked paprika – Subtle smokiness that ties the egg and beef together
- Salt and black pepper to taste – Season every component individually for the best result
- 1.5 cups shredded cheddar cheese – Scattered over the hot filling so it melts before rolling
- 2 tablespoons butter, divided – One for scrambling the eggs, one for toasting the burritos
- 2 tablespoons milk or cream – Whisked into the eggs for the softest scramble
- 3/4 cup refried beans – The family secret layer; 2 tablespoons per tortilla before the filling goes on
- Salsa, sour cream, or hot sauce for serving – Optional but genuinely makes the whole experience better
Step-by-Step Instructions
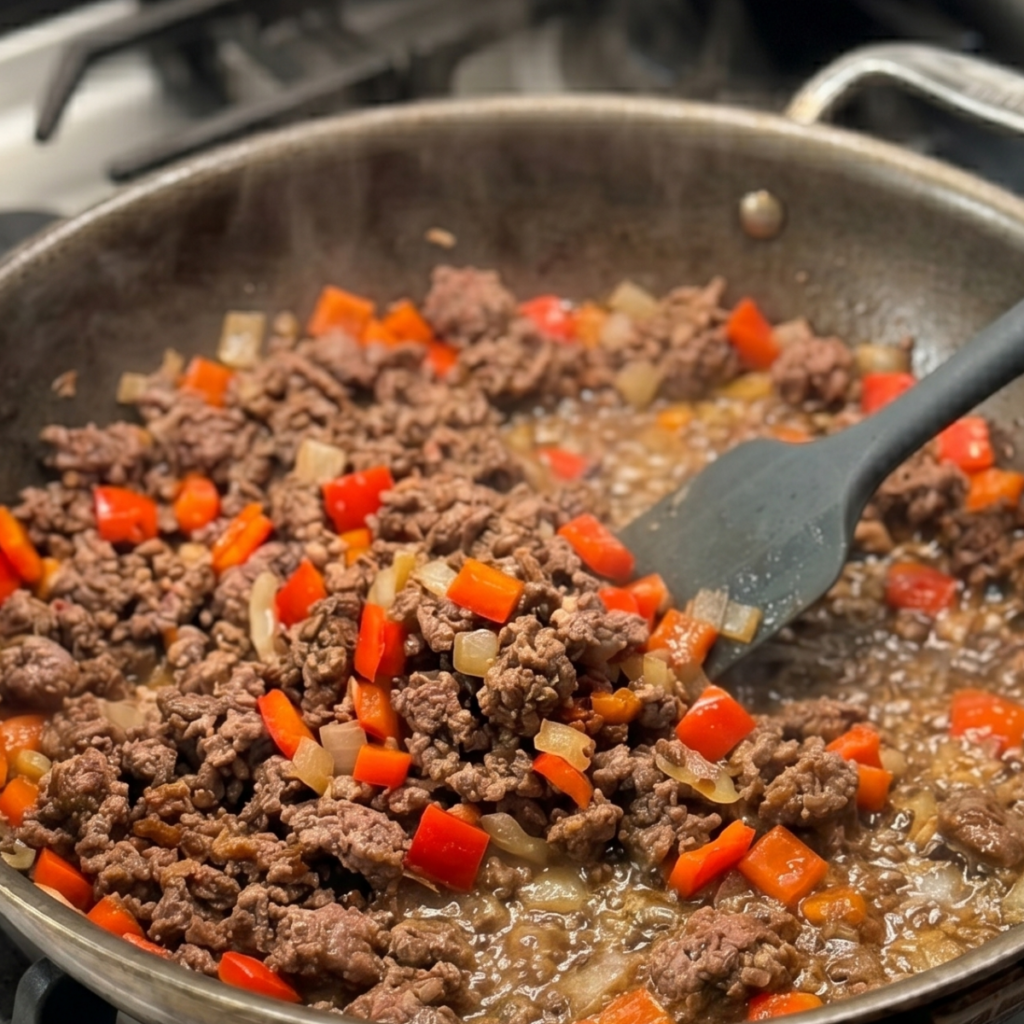
Step 1: Cook the Meat and Vegetables
- Heat a large skillet over medium-high heat and add the ground beef or sausage, breaking it into small crumbles and cooking until deeply browned with no pink remaining, about 5 to 6 minutes
- Add the diced onion and red bell pepper to the skillet and cook for another 3 to 4 minutes until softened and the onion is translucent
- Stir in the cumin, garlic powder, smoked paprika, salt, and pepper and cook for 30 seconds until the spices bloom and the whole kitchen smells like a weekend should
- Transfer the meat mixture to a bowl and set aside; wipe the skillet clean and lower the heat to medium-low for the eggs
Step 2: Scramble the Eggs
- Whisk the eggs, milk, salt, and pepper together in a bowl for 60 seconds until fully combined and slightly airy
- Melt one tablespoon of butter in the cleaned skillet over medium-low heat and pour in the egg mixture; let it sit undisturbed for 20 seconds until the edges just begin to set
- Use a rubber spatula to push the eggs gently from the edges toward the center in slow, sweeping strokes; cook until large soft curds form and the eggs look just slightly underdone
- Remove from heat immediately; the eggs will finish from residual heat and should be glossy and soft rather than dry and crumbly when they go into the burrito
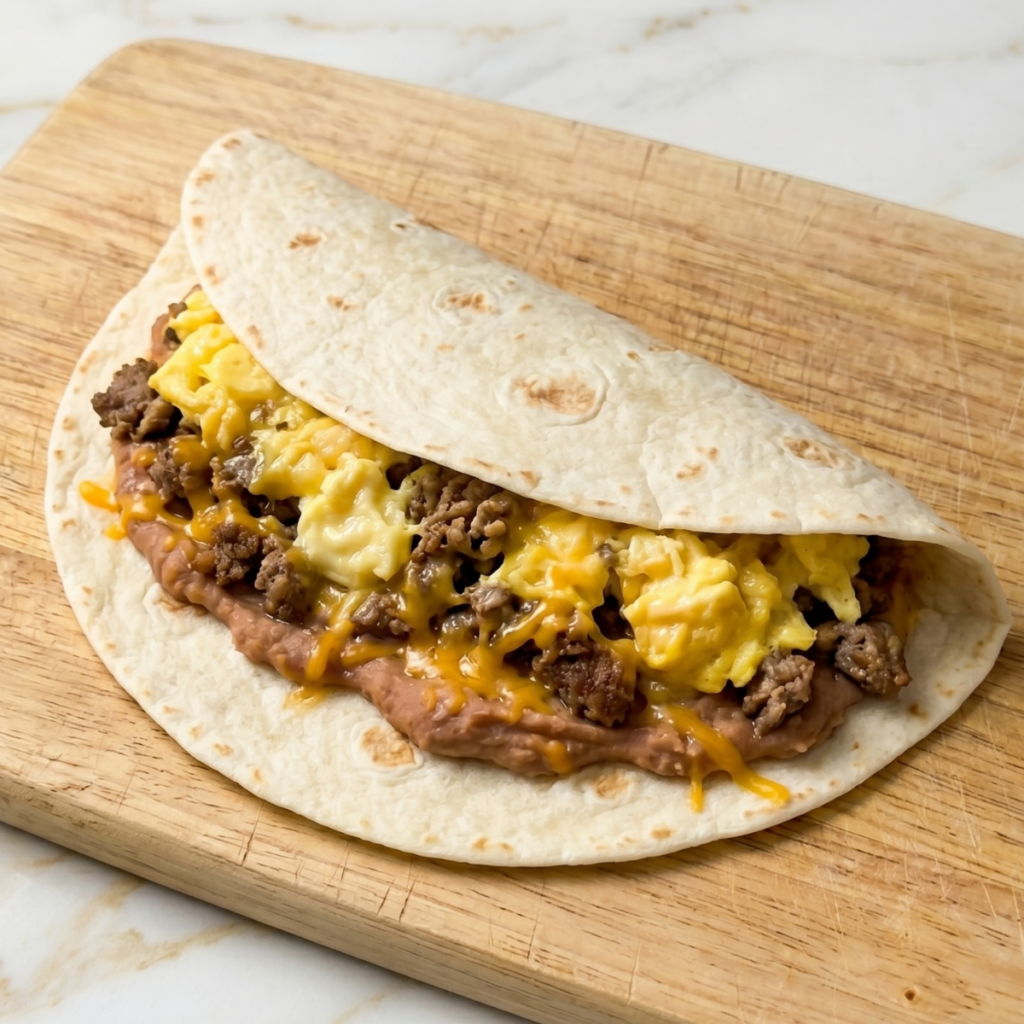
Step 3: Assemble the Burritos
- Warm each tortilla for 20 to 30 seconds in a dry skillet or microwave until pliable; cold tortillas crack when you fold them and the whole burrito splits
- Spread 2 tablespoons of refried beans across the lower half of the tortilla, then add a modest amount of meat mixture, a portion of scrambled egg on top, and scatter cheese over everything
- Fold the left and right sides of the tortilla in toward the center first, then fold the bottom edge up and over the filling, and roll firmly away from you while pressing gently to compact the filling
- Place the finished burrito seam-side down immediately and do not move it until you are ready to toast it; the seam will hold from its own weight and gravity is doing useful work here
Step 4: Toast and Serve
- Melt the remaining tablespoon of butter in a large skillet over medium heat until foamy, then add the burritos seam-side down and cook without moving for 60 to 90 seconds until the seam is sealed and the underside is golden
- Roll each burrito to the next side and continue toasting for about 30 seconds per side until all four sides are golden and the whole burrito is warm throughout
- Serve immediately with salsa, sour cream, or hot sauce on the side; the toasted exterior gives a satisfying crunch against the soft egg and melted cheese inside
- For meal prep, skip the toasting step entirely; let the assembled burritos cool completely, wrap tightly in foil, and freeze for up to 2 months for the best grab-and-go breakfast all week
Breakfast Burritos Variations
Mia’s “Just Egg and Cheese Please” Version
Mia went through a phase of eating everything separately, and in this case the phase has never ended. She inspects every burrito before taking a bite to ensure the beef is evenly distributed and not concentrated in one area, which she considers unfair to the other bites. For her preferred version, skip the meat entirely, double the scrambled egg, add extra cheese, and fold in a few tablespoons of salsa for flavor. She calls this “the simple one” and eats it faster than any other version at the table, which tells you everything about what she actually prefers.
Ben’s “Extra Beef, Maximum Cheese” Version
Ben’s position on protein is that more is always correct, and he applies this logic uniformly across all meals. For his version, use three-quarters of a pound of ground beef instead of half, increase the cheese to almost a full cup per burrito, and lean into the refried bean layer, which he calls “the secret layer,” and add extra. The beans act as a barrier that keeps everything else in place during rolling, and the extra meat makes these extremely filling. Ben considers this the definitive version and refers to the original as “the one with less beef.” He is not wrong that this is more substantial.
The Full Freezer Prep Version
This is the version I make when I want two weeks of school morning breakfasts handled in one Sunday hour. Double the entire recipe, assemble twelve burritos without toasting any of them, let them cool completely on a tray, then wrap each one tightly in foil and stack them in a large freezer bag labeled with the date. Microwave from frozen at 50 percent power for 2 to 3 minutes or reheat in the air fryer at 375 degrees F for 8 minutes for a crispy exterior. Ben says the air fryer version is better than fresh, and I am not going to argue with results.
Substitutions
Ground beef to chorizo: Mexican chorizo crumbled and cooked in place of ground beef gives a completely different but absolutely wonderful result. The spiced pork fat perfumes the whole burrito, and you can reduce the additional spices to just a pinch of garlic powder since chorizo is already heavily seasoned. Ben discovered this version by accident when the ground beef had run out and declared it “the better accident.”
Flour tortillas to whole wheat tortillas: Whole wheat tortillas work in exactly the same size and method. They are slightly more dense than plain flour and have a nuttier flavor that works well with the egg and beef combination. Make sure to warm them before rolling since whole wheat tortillas crack more readily than plain flour when cold.
Cheddar to Monterey Jack or pepper jack: Monterey Jack melts more smoothly than cheddar and gives a creamier, less sharp result that some people prefer in a burrito. Pepper jack adds a welcome heat that works especially well against the softness of the scrambled egg. Either substitutes in exactly the same quantity.
Ground beef to black beans for a vegetarian version: One drained and rinsed can of black beans seasoned with the same cumin, paprika, and garlic powder substitutes directly for the meat. Saute the beans briefly with the onion and pepper so they pick up color and flavor rather than just dumping them in cold. The protein count drops, but the burrito is still filling and genuinely delicious.
Equipment
- Large skillet for the meat and for toasting the burritos
- Medium skillet or the same skillet wiped clean for the eggs
- Rubber spatula for the scrambled eggs
- Medium mixing bowl for whisking the eggs
- Sharp knife and cutting board for the pepper and onion
- Large flat surface or clean cutting board for assembling the burritos
- Aluminum foil for wrapping the meal prep version
- Measuring spoons for the spice blend
- Tongs for turning the burritos while toasting
Storage Tips
Make Ahead
- Cook the meat mixture and scrambled eggs up to 2 days ahead and store separately in the fridge; assemble and toast fresh burritos in under 5 minutes on any morning
- Assemble the full batch of untoasted burritos on Sunday and refrigerate wrapped in foil for up to 3 days for grab-and-go mornings that require zero cooking
- Double or triple the recipe on Sunday and freeze the extras for up to 2 months; one prep session covers the whole month of weekday breakfasts
Refrigerator
- Store assembled untoasted burritos wrapped individually in foil in the fridge for up to 3 days
- Toasted burritos can be stored but lose their crispiness in the fridge; reheat in a dry skillet rather than the microwave to restore some of the exterior texture
- Store the meat and egg components separately if possible for the freshest assembly each day
Freezing
- Freeze assembled untoasted burritos wrapped tightly in foil and stored in a labeled freezer bag for up to 2 months
- Do not freeze already-toasted burritos; the tortilla becomes tough and dry after freezing and the texture does not recover well
- Freeze in a single layer first on a baking sheet until solid, then stack in the freezer bag so they do not fuse together and can be pulled out individually
Reheating
- Microwave from frozen still in the foil at 50 percent power for 2 minutes, then unwrap and microwave on full power for another 30 to 60 seconds until hot throughout
- Air fryer reheating at 375 degrees F for 7 to 8 minutes gives a genuinely crispy exterior that the microwave cannot match; Ben calls this the best version and he is correct
- Oven reheating from frozen at 350 degrees F wrapped in foil for 25 minutes, then unwrapped for 5 minutes, gives a result close to freshly made with no soggy tortilla
Family Secret Worth Sharing
My mom always put a thin layer of refried beans on the tortilla before anything else went on top, and I thought this was just her preference until I made burritos without it one morning and immediately noticed that everything slid around inside and the first bite was uneven. The beans act as a glue layer that anchors the filling in place, keeps the egg from migrating to one end, and adds a subtle earthy creaminess that makes the whole burrito taste more complete. I add about two tablespoons spread thinly across the lower half of each tortilla before the meat goes on. Mia does not know there are beans in hers and has eaten every one without comment. Ben knows, calls them “the secret layer,” and adds extra. That is exactly how recipes pass from one generation to the next, and I find it genuinely comforting every single time.
Troubleshooting FAQs
My burritos keep bursting open when I toast them. What am I doing wrong?
Two things: too much filling or a seam that was not sealed properly before toasting. Use less filling than feels right, fold the sides in first before rolling, and place the burrito seam-side down the moment it is rolled without setting it on any other side first. The skillet heat seals the seam from underneath in the first sixty seconds, and once that seal is set, the burrito holds together through the rest of the toasting.
The tortilla cracks when I try to roll it. What do I do?
The tortilla is cold or dry. Warm each tortilla for 20 to 30 seconds in a dry skillet or wrapped in a damp paper towel in the microwave before filling. A warm, pliable tortilla rolls without any resistance or cracking. This is especially important with whole wheat tortillas, which crack more readily than plain flour when they are cold.
The eggs are rubbery and dry in the finished burrito. How do I fix it?
The eggs were cooked too far before rolling. Pull them off the heat when they still look slightly underdone and glossy; they will finish cooking from the residual heat of the filling and the skillet toasting. Eggs that go into a burrito already fully set will be overcooked and dry by the time the burrito reaches the table. Pull early every single time.
The frozen burritos are soggy after reheating. What happened?
The burritos were not cooled completely before wrapping and freezing, which trapped steam inside and made the tortilla wet. Always let assembled burritos cool to room temperature on a rack before wrapping in foil and freezing. The air fryer reheating method is also significantly better than the microwave for avoiding sogginess; the dry circulating heat crisps the exterior instead of steaming it.
Sunday Prep, Monday to Friday Sorted
Sunday afternoons in our kitchen smell like cumin and toasted tortilla, and it is genuinely one of my favorite things. Ben rolls his own now with the focused technique of someone who has been burned by an exploding burrito before and learned from it. Mia stacks hers in the freezer bag in height order, which she has decided matters. These breakfast burritos have become one of our most reliable healthy make-ahead breakfast recipes in the whole weekly routine, sitting right alongside our easy protein breakfast meal prep recipes that take Sunday prep and turn it into five days of easy mornings. For the weeks when I want both breakfast and lunch handled in one prep session, these burritos next to our high-protein meal prep recipes mean the whole week runs on autopilot and nobody is grabbing something bad out of desperation at seven in the morning. That is a genuinely good problem to have solved.
Don’t forget to snap a picture of your breakfast burritos before that… (trust me, it will disappear quickly!), and leave a rating below. We’d love to hear how this breakfast burrito recipe becomes part of your family morning story.